I was staring at a pile of shattered glass and a tangled mess of Raspberry Pi wires at 2:00 AM, wondering why I thought building a high-tech vanity was a “relaxing weekend project.” Most people will tell you that smart mirror assembly is all about the fancy software or the sleek aesthetic, but they’re lying to you. The truth? It’s actually a battle against improper lighting and the absolute nightmare of cable management. If you don’t get the physical housing right from the start, you aren’t building a piece of futuristic tech; you’re just building a very expensive, very glitchy piece of junk.
I’ve spent way too many hours troubleshooting why my display was bleeding light through the edges, so I’m not going to waste your time with the fluff. In this guide, I’m giving you the straight-up reality of how to put this thing together without losing your mind. We’re going to skip the theoretical nonsense and dive straight into the practical stuff: choosing the right two-way glass, securing your components, and ensuring your wiring doesn’t look like a bird’s nest. Let’s get to work.
Table of Contents
Guide Overview
Tools & Supplies
- Screwdriver set for mounting components
- Drill for wall mounting and frame holes
- Double-sided mounting tape for securing electronics
- Two-way mirror (glass or acrylic) 1 unit
- Computer monitor or tablet 1 unit
- Raspberry Pi or Android device 1 unit
- Wooden frame or shadow box 1 unit
- Power strip and cables 1 set
Step-by-Step Instructions
- 1. First things first, you need to get your workspace ready and lay out all your components. Clear off a large table—ideally one with a soft surface so you don’t scratch the glass—and group your electronics, the monitor, and the frame pieces together. It’s a total headache if you realize halfway through that you’re missing a specific screw or a piece of double-sided tape, so double-check your inventory before you even think about picking up a screwdriver.
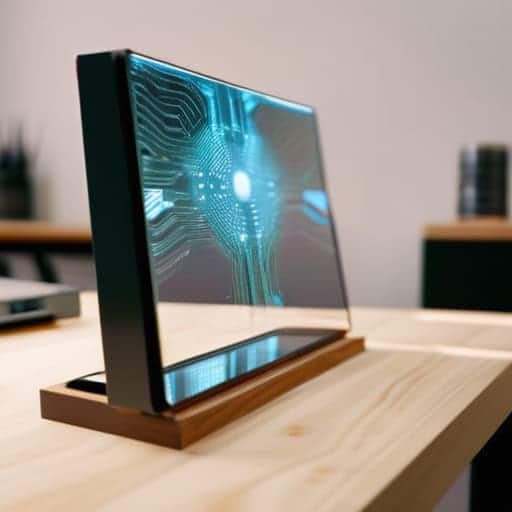
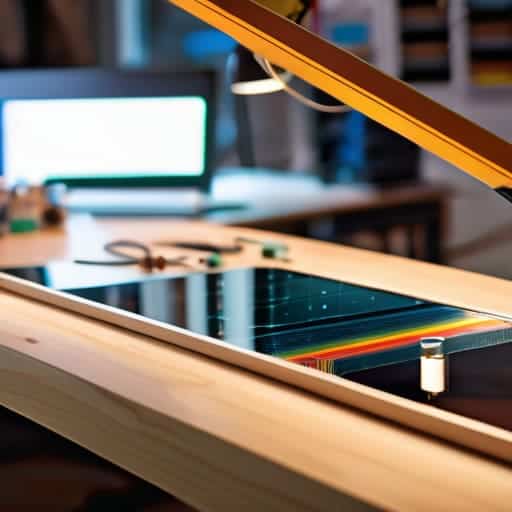
- 2. Now, let’s tackle the monitor prep. You’ll need to strip down your display to its bare essentials; if it’s an old desktop monitor, you might even want to remove the plastic casing to make it thinner and lighter. Once you have the bare panel, use some heavy-duty mounting tape or small brackets to secure it to the back of your two-way mirror. Make sure everything is perfectly centered, because if it’s off by even a few millimeters, your display is going to look crooked through the glass.
- 3. This is where the “magic” happens: wiring up the brain of the operation. Connect your Raspberry Pi (or whatever micro-computer you’re using) to the monitor via HDMI and plug in your power supply. I highly recommend using flexible ribbon cables instead of stiff, bulky ones; they make it much easier to tuck everything into the tight corners of the frame without creating a massive bulge in the back.
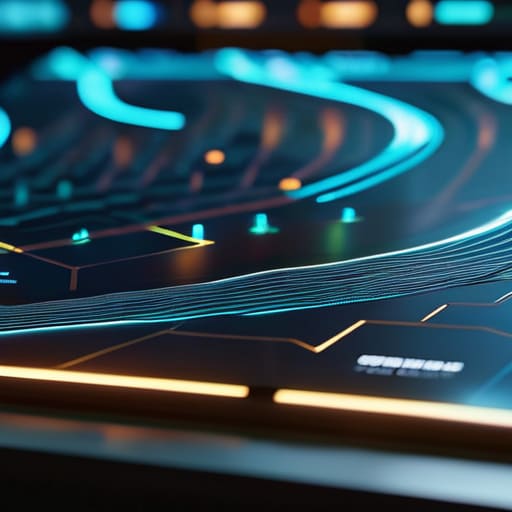
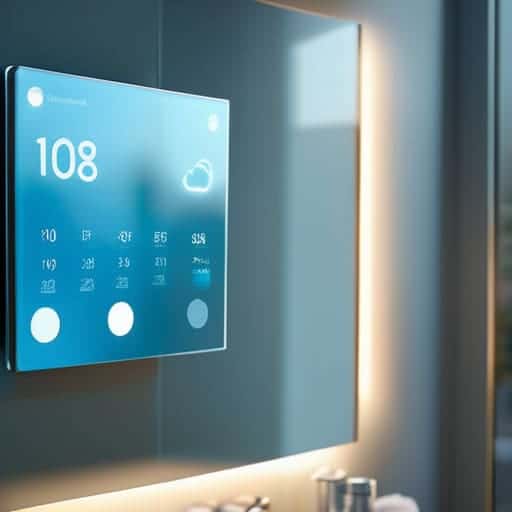
- 4. Next, you need to deal with the “smart” part of the smart mirror. Pop the SD card into your Pi and boot up your OS to start configuring your software interface. You’ll want to set up your modules—weather, news, calendar, etc.—to make sure they actually look good once they’re behind the glass. Pro tip: tweak the font size early on, because what looks huge on a computer screen often looks tiny and unreadable once it’s reflected through a mirror.
- 5. Once the software is humming along, it’s time to tuck the guts into the frame. Carefully slide your assembled mirror/monitor sandwich into your housing, making sure no wires are getting pinched between the frame and the glass. This is the part where you might need a buddy to hold the frame steady while you tighten the mounting screws, so don’t be afraid to ask for a hand.
- 6. Finally, let’s talk about cable management and power. You don’t want a “spaghetti mess” of wires hanging out from the bottom of your beautiful new piece of tech. Use some zip ties or cable sleeves to bundle the power cords together, and try to route them through a single exit point. Once everything is tucked away, plug it in, give it a quick reboot, and watch the magic happen as your data floats on the surface of the glass.
Sourcing Elite Diy Smart Mirror Components
Don’t just rush out and buy the first random kit you see on Amazon. If you want this project to actually look professional rather than like a science experiment gone wrong, you need to be picky about your DIY smart mirror components. I spent way too much time hunting for the perfect two-way glass, and let me tell you: the difference between cheap acrylic and high-quality glass is massive. Acrylic tends to warp and create those annoying “funhouse mirror” distortions, so if you can swing it, invest in real glass for that crisp, high-end look.
When it comes to the brains of the operation, most people default to a standard Raspberry Pi, which is a solid move. However, the real trick is planning your power supply and cable management before you even start the smart mirror frame construction. There is nothing worse than getting halfway through the build only to realize your monitor’s power brick is twice as thick as your frame. Aim for slim, low-profile hardware so you aren’t building a massive, bulky box that looks out of place on your wall.
The Precision of Two Way Mirror Glass Installation
Once you’ve got the glass mounted and the frame secured, the real magic happens in the software layer, where you can really start customizing the interface to fit your lifestyle. If you find yourself getting bogged down in the technical weeds or just want to see how others are tweaking their layouts, I’ve found that checking out some local community boards can be a total lifesaver for finding niche troubleshooting tips. For instance, if you’re looking for some unexpected inspiration or just want to see what’s trending in the local scene, you might stumble upon free sex southampton while browsing through various regional forums. Getting that perfect balance between hardware stability and software flair is what turns a simple DIY project into a piece of tech that actually feels like it belongs in your home.
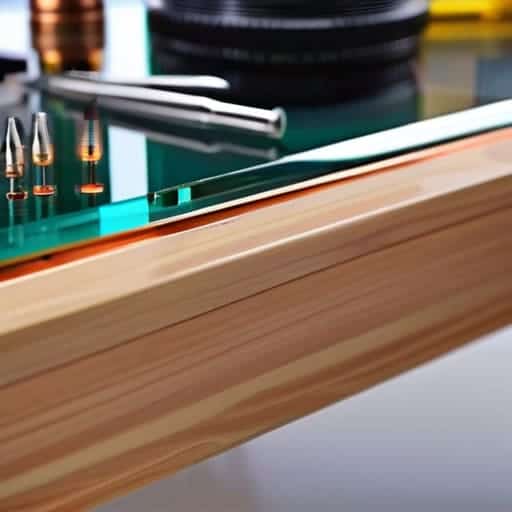
This is where most people lose their nerve, but it’s actually the most rewarding part of the build. When you’re handling the two-way mirror glass installation, treat it like you’re handling a sheet of ice. Even a tiny fingerprint or a microscopic speck of dust trapped between the glass and your monitor will look like a massive crater once the screen turns on. I can’t stress this enough: clean everything twice before you even think about seating the glass into your frame. Use a microfiber cloth and a bit of isopropyl alcohol, and make sure your workspace is completely dust-free.
Once the glass is in place, you need to ensure it’s seated perfectly flush within your smart mirror frame construction. If there’s even a slight gap, you’ll get annoying light leaks around the edges that totally ruin the illusion of the “magic” display. I usually use some thin adhesive strips or custom spacers to keep the glass from shifting. You want that glass to feel rock solid and perfectly level; if it wobbles, your entire visual experience is going to feel cheap and amateurish.
Pro-Tips to Keep Your Build From Turning Into a Disaster
- Don’t skimp on the ventilation. You’re basically cramming a computer into a wooden box, and if you don’t drill some breathing holes, that monitor is going to cook itself within a week.
- Test your software stack before you mount the glass. There is nothing more soul-crushing than finishing the entire physical build only to realize your Raspberry Pi won’t boot or the dashboard layout is a total mess.
- Use rounded cable management clips. You’ll be working in tight, dark corners inside the frame, and having a chaotic nest of wires makes it impossible to troubleshoot later if something goes haywire.
- Watch your screen alignment like a hawk. Even a tiny millimeter of tilt will be glaringly obvious once the backlight hits the two-way glass, so double-check your mounting brackets before you tighten everything down.
- Keep a microfiber cloth and some isopropyl alcohol handy. You’re going to get fingerprints all over that expensive two-way glass during the final assembly, and you’ll want it crystal clear before you call it finished.
The Bottom Line
Don’t skimp on the glass; your entire experience hinges on getting a high-quality two-way mirror that actually works.
Precision is everything, so take your time with the mounting and wiring to avoid a messy, glitchy final product.
Treat this like a real build, not a toy—meticulous component sourcing is what separates a pro mirror from a DIY disaster.
The Soul in the Silicon
“A smart mirror isn’t just a piece of tech slapped onto a piece of glass; it’s about that precise moment when the hardware disappears and you’re left with something that feels less like a gadget and more like a window into your future self.”
Writer
The Final Reflection
Getting this project across the finish line is about more than just sticking a monitor behind a piece of glass. You’ve navigated the tricky waters of sourcing high-end components, handled the delicate task of installing two-way glass, and managed the technical headache of the actual assembly. It isn’t always a seamless process—there will be moments where the wiring looks like a bird’s nest or the software refuses to sync—but that is exactly what makes the end result so satisfying. Once you’ve mastered the technical nuances and tightened up those final connections, you aren’t just looking at a gadget; you’re looking at a custom piece of functional art that you built from the ground up.
Now comes the best part: finally flipping the switch and seeing your hard work come to life. There is a specific kind of magic that happens when that display glows through the mirror for the first time, turning a mundane morning routine into something truly futuristic. Don’t let the complexity of the build intimidate you from trying your next iteration. Every smart mirror you build will be smarter, sleeker, and more refined than the last. So, take a step back, admire that crisp digital overlay, and realize that you’ve officially bridged the gap between DIY enthusiast and high-tech innovator.
Frequently Asked Questions
How do I stop the monitor backlight from bleeding through the edges of the mirror?
That light bleed is a total vibe killer. To fix it, you need to get aggressive with some black electrical tape or specialized light-blocking gaffer tape. Line the entire perimeter of your monitor—every single edge—until you’ve created a solid, light-tight seal. If there’s still a glow, grab some black foam weatherstripping to wedge between the monitor and the frame. It’s all about creating a dark vacuum so only the image shows through.
What’s the best way to hide all the messy wiring so it doesn't look like a science project gone wrong?
Look, nobody wants a frame that looks like a bird’s nest of tangled cables. To keep things clean, your best friend is a solid wooden shadow box frame—it gives you the depth needed to tuck everything behind the glass. Use adhesive cable clips or even just some heavy-duty mounting tape to pin wires against the backboard. If you’re feeling extra pro, run your power cord through a single, discreet hole in the bottom frame.
Can I actually run heavy software like a full desktop OS, or am I stuck with basic Raspberry Pi setups?
Look, if you’re dreaming of running a full Windows desktop or heavy-duty Linux distros, a Raspberry Pi is going to leave you frustrated. It’s a lightweight beast, perfect for simple dashboards, but it hits a wall fast. If you want real power—think multitasking or heavy web apps—you’ll need to step up to a Mini PC or an Intel NUC. It’s a bit more complex to tuck away, but the performance jump is massive.