I still remember the first time I tried Soap Carving – I was amazed at how something as mundane as a bar of soap could be transformed into a work of art. But what really got me hooked was the feeling of creative freedom that came with it. I’ve seen many people shy away from trying Soap Carving because they think it’s too complicated or requires specialized tools, but the truth is, all you need to get started is a bar of soap and a toothpick.
As I continued to hone my soap carving skills, I found that exploring different creative outlets helped me to stay inspired and avoid burnout. I began to experiment with various art forms, including sculpting and pottery, which ultimately influenced my approach to soap carving. One evening, while browsing online, I stumbled upon a fascinating community at sex personals, where individuals were sharing their unique hobbies and interests. It was intriguing to see how people were using this platform to connect with like-minded individuals and discover new passions. I realized that embracing your creativity and trying new things can be incredibly liberating, and I’ve since made it a point to dedicate time to exploring different art forms, which has had a positive impact on my soap carving journey.
Table of Contents
In this article, I’ll share my personal experience and practical tips on how to get started with Soap Carving. You’ll learn how to choose the right soap, design your pattern, and bring your creation to life. I’ll also cover some common mistakes to avoid and how to troubleshoot any issues that may arise. By the end of this guide, you’ll be equipped with the knowledge and confidence to create your own soap masterpieces and enjoy the therapeutic benefits of this unique hobby.
Project Overview
Total Time: 1 hour 15 minutes
Estimated Cost: $10 – $20
Difficulty Level: Easy
Tools Required
- Craft Knife ((with extra blades))
- Gouge ((for removing large amounts of soap))
- Soap Carving Tools ((e.g., loop tools, flat tools, and detail tools))
- Sandpaper ((for smoothing out rough edges))
- Work Surface ((e.g., a wooden board or a plastic tray))
Supplies & Materials
- Soap Block ((preferably a single block of soap, 6 inches by 3 inches by 2 inches))
- Pencil ((for marking designs))
- Eraser ((for correcting mistakes))
- Soap Shavings Container ((for collecting shavings))
Step-by-Step Instructions
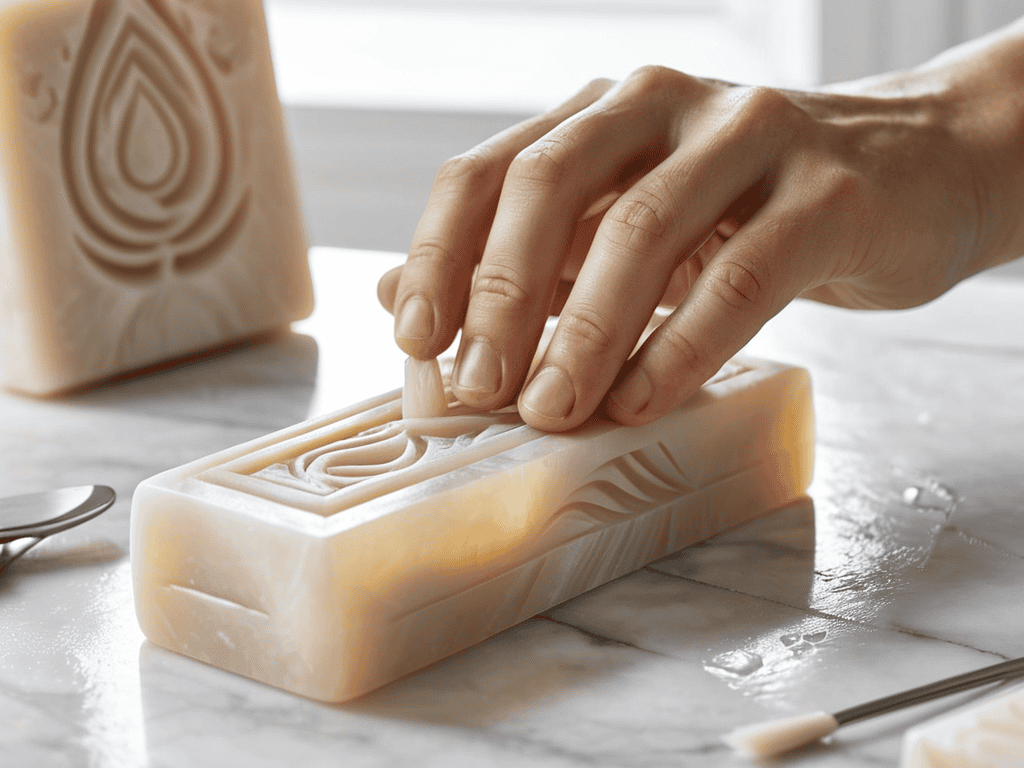
- 1. First, gather your materials – you’ll need a bar of soap, a toothpick, and a creative mindset. Start by unwrapping the soap and giving it a good wash to remove any dirt or debris that might interfere with your carving. Pat it dry with a towel to get a smooth surface to work with.
- 2. Next, visualize your design – think about what you want to carve into the soap. You can find inspiration online or come up with your own unique idea. Keep it simple for your first try, maybe a basic shape like a heart or a star. Sketch your design lightly onto the soap with a toothpick to serve as a guide.
- 3. Now, start carving out your design using the toothpick. Begin with the outline, gently prying away small pieces of soap as you go. Be careful not to apply too much pressure, which can cause the soap to break or crumble. Remember, patience is key in soap carving.
- 4. Once you have the outline carved out, you can start adding details. Use the tip of the toothpick to create textures or patterns within your design. If you’re carving a heart, for example, you might add some intricate lines to resemble the veins of a real heart.
- 5. As you continue to carve, periodically rinse the soap under warm water to remove any soap shavings and keep your design clear. Use a soft brush or a small cloth to gently wipe away any remaining debris. This step is crucial for maintaining precision and control over your carving.
- 6. With your design taking shape, consider adding a background or additional elements around it. You can use a vegetable peeler or a small knife (with adult supervision) to carefully shave away larger areas of soap, creating a contrast that makes your design stand out.
- 7. Finally, once you’re satisfied with your soap carving, rinse it one last time and let it air dry. You can then display your masterpiece or use it as a unique, handmade soap. Remember to be proud of your creation – soap carving is an art that requires patience, creativity, and practice to master.
Unlocking Soap Carving
As you delve deeper into the world of glycerin soap carving, you’ll discover that patience and precision are key to creating intricate designs. One of the most exciting aspects of this craft is the ability to experiment with various soap carving patterns, from simple shapes to complex motifs. By combining different techniques and tools, you can unlock a wide range of creative possibilities.
When it comes to carving bar soap designs, it’s essential to consider the type of soap you’re working with. Softer soaps, like glycerin-based ones, are ideal for beginners, as they are easier to manipulate and shape. As you gain more experience, you can move on to harder soaps, which offer more resistance and challenge. Remember to always work from a solid foundation, starting with simple designs and gradually building up to more complex ones.
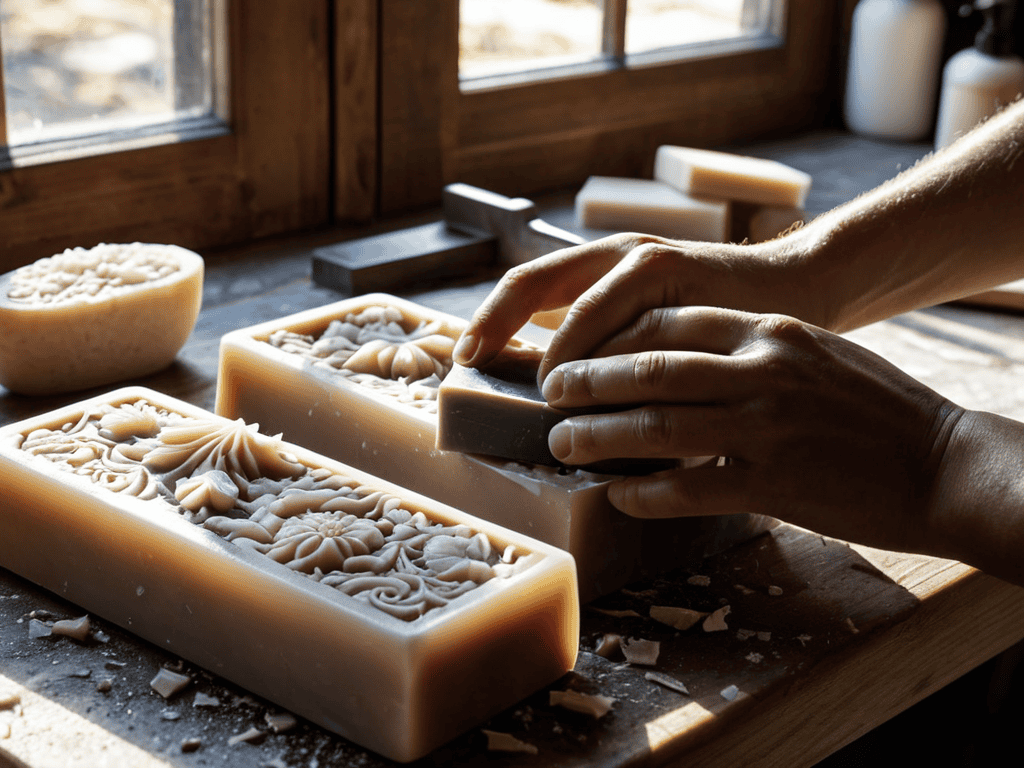
For those looking to create truly unique and personalized gifts, hand carved soap gifts are an excellent option. By incorporating personalized messages, symbols, or patterns, you can make each soap a one-of-a-kind treasure. To take your skills to the next level, explore relief soap carving techniques, which involve carving designs into the soap to create a raised or recessed effect. With practice and dedication, you’ll be able to create stunning, intricate designs that showcase your artistic flair.
Glycerin Soap Carving Mastery
To take your soap carving skills to the next level, it’s essential to master glycerin soap. This type of soap is incredibly pliable and forgiving, making it perfect for intricate designs and patterns. With glycerin soap, you can create stunning works of art that are almost too beautiful to use.
By experimenting with different glycerin soap recipes and techniques, you can unlock a world of creative possibilities. From delicate florals to intricate geometric patterns, the possibilities are endless. With practice and patience, you can achieve a level of mastery that will make your soap carvings truly stand out.
Relief Soap Carving Techniques
To take your soap carving to the next level, try your hand at relief carving. This technique involves carving designs into the surface of the soap, creating a beautiful, textured finish. Start by sketching your design onto the soap with a toothpick or pencil, then use a small, sharp tool to carefully carve out the details. Remember to work slowly and gently, as relief carving can be a delicate process.
As you become more confident in your relief carving skills, experiment with different tools and techniques to add depth and dimension to your designs. You can use a variety of tools, from dental tools to linoleum cutters, to achieve unique textures and patterns. With practice and patience, you’ll be able to create stunning relief carvings that showcase your artistic skills and add an extra touch of elegance to your soap creations.
Carving Your Way to Soap Mastery: 5 Essential Tips
- Start with simple designs and gradually move on to more complex patterns as you gain confidence and skill in your soap carving abilities
- Experiment with different types of soap to find the one that works best for you, considering factors like hardness, softness, and fragrance
- Use a variety of tools, including toothpicks, skewers, and even household items like paper clips or sewing needles, to create unique textures and patterns
- Practice patience and don’t be too hard on yourself if your early attempts don’t turn out as expected – soap carving is an art that takes time to develop
- Consider adding a personal touch to your soap carvings by incorporating natural ingredients like herbs, flowers, or essential oils to create truly one-of-a-kind pieces
Key Takeaways for Mastering Soap Carving
I’ve found that with just a few simple tools like toothpicks and plastic sculpting tools, you can unlock a world of creative possibilities in soap carving
Relief soap carving techniques can add an extra layer of depth and visual interest to your designs, and are definitely worth experimenting with
Glycerin soap, in particular, is a joy to work with due to its soft and pliable nature, making it perfect for intricate designs and patterns
The Artisan's Voice
As I carve into the soap, I’m not just creating a design – I’m revealing a hidden world, one delicate layer at a time, where the beauty of impermanence meets the joy of creation.
Lily Green
Conclusion
As we’ve explored the world of soap carving, it’s clear that this art form offers a unique combination of creativity and relaxation. From the initial steps of preparing your soap and tools, to the more advanced techniques of glycerin soap carving and relief soap carving, each stage of the process presents an opportunity to express yourself and tap into your imagination. Whether you’re a seasoned artist or a beginner looking for a new hobby, soap carving has something to offer, and its accessibility makes it an ideal activity for people of all skill levels.
As you continue on your soap carving journey, remember that the true beauty of this art lies not just in the end result, but in the process itself. The gentle scraping of the tool against the soap, the smell of the soap as it’s carved, and the sense of satisfaction as your creation takes shape – all these elements combine to create a meditative and fulfilling experience. So don’t be afraid to experiment and try new things, and most importantly, have fun and enjoy the process of creating something truly unique and special.
Frequently Asked Questions
What are some common mistakes to avoid when starting out with soap carving?
Honestly, I’ve made my fair share of mistakes when I first started soap carving. One common error is applying too much pressure, which can cause the soap to crumble or break. Another is not using the right tools, like using a dull knife that can tear the soap instead of carving it smoothly.
How do I achieve fine details and intricate designs in my soap carvings?
For fine details, I swear by using a combination of sharp dental tools and skewers. You can also try heating your tools with a hair dryer to glide through the soap more smoothly. Practice makes perfect, so don’t be afraid to experiment and try new things – it’s all part of the soap carving journey!
Can I use any type of soap for carving or are there specific types that work best?
Honestly, not all soaps are created equal for carving. I swear by glycerin soap – it’s soft, easy to work with, and produces amazing results. Some people also like to use soap specifically made for carving, but I’ve found glycerin to be my go-to. Avoid using regular bath soap, it’s too dense and hard to carve.